Changes
-
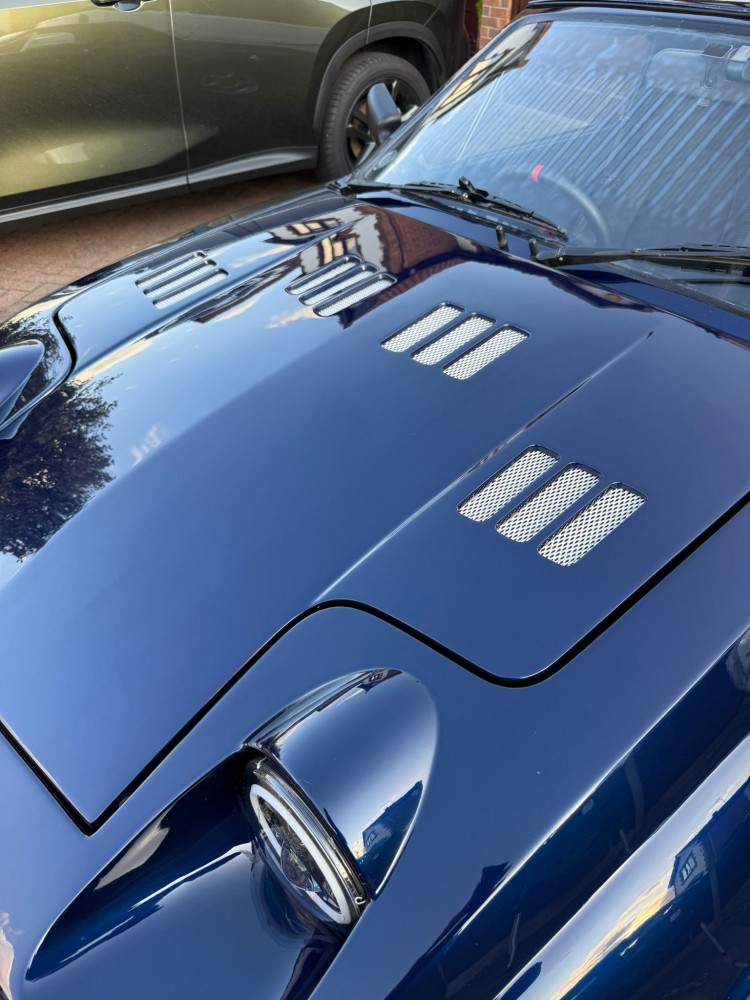
New air filter +
Before 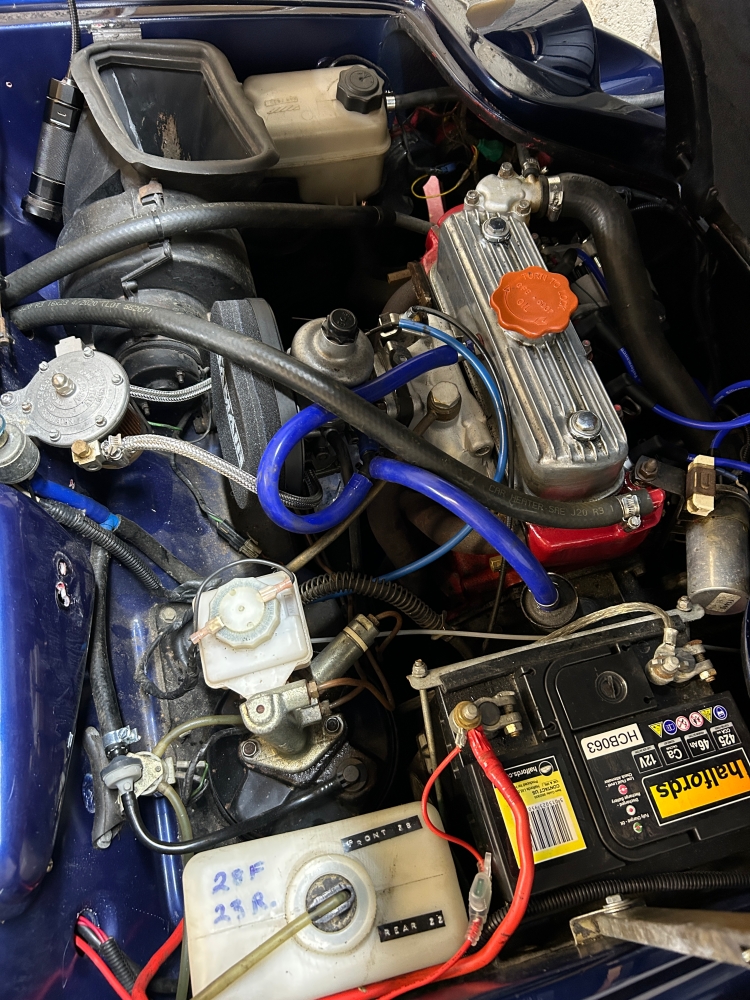
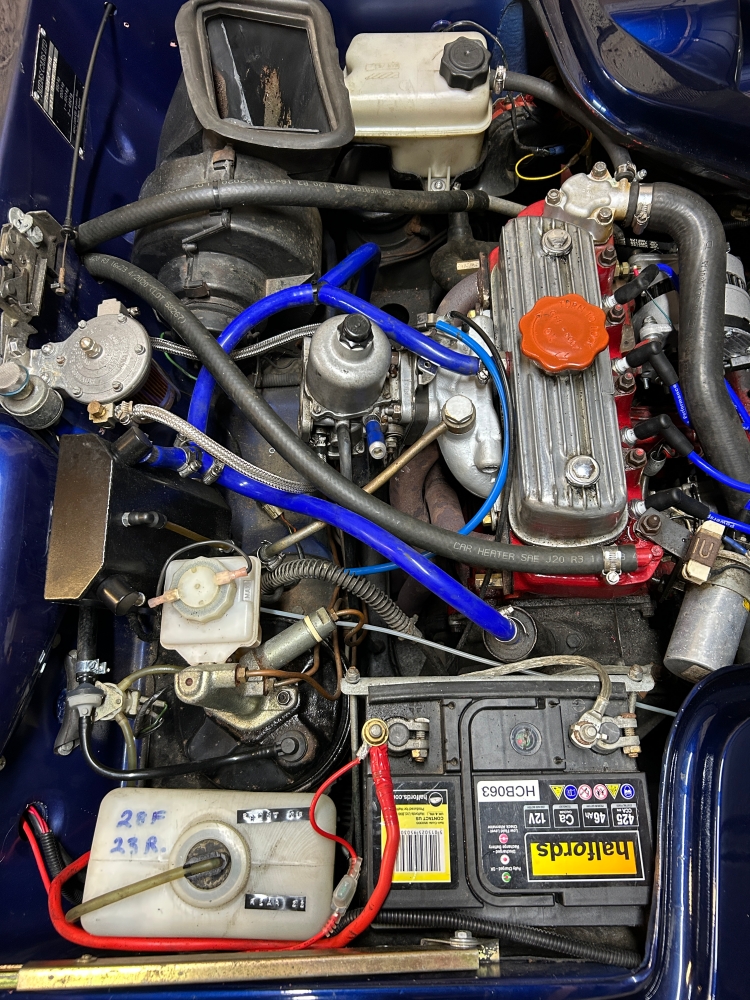
After After AC Dodd tuned my Midas there were several changes I had to do. The first of these was to fit a new air filter and so I got a RamAir one from MiniSpares. To do this I had to remove the breather catch tank as there wasn’t room for the air filter and the catch tank. As a result of this I had to sort out the breather hoses. I removed the one from the blanking plate for the mechanical fuel pump and had to fit a new blanking plate and gasket also purchased from MiniSpares. When I removed the catch tank I found that there was no oil in it just condensed water. Whilst Adrian was working on the car the overflow water pipe split at the thermostat housing and so at the time we shortened the pipe and refitted it but it was barely long enough. I replaced the pipe with new pipe and hose clips of a better length. One final thing to do and that is to fit the re-curved Powerspark distributor, but that will wait for another day
-
-
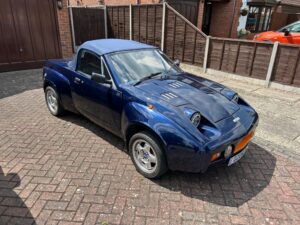
Midas detailed
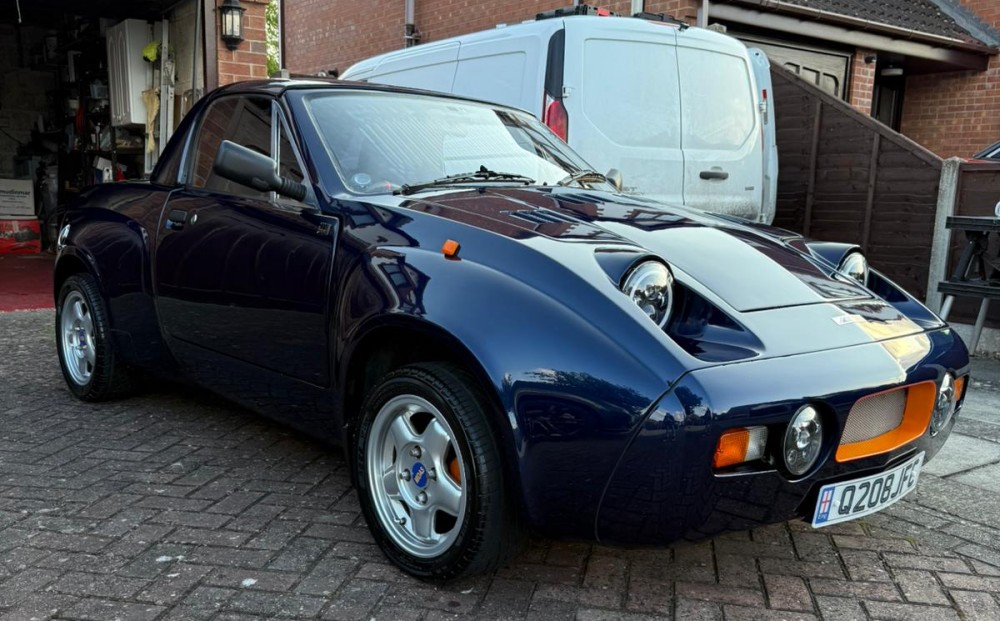
When I bought the Midas a couple of years ago it had racing type numbers on both doors and on the bonnet. I removed these but there was some paint fading visible that I tried to remove with some compound and then some T-Cut but this wasn’t that successful and the outline of the numbers was still visible from some angles. I decided to have the Midas power polished by a detailer. I was recommended to use Dylan from Vehiclean a local detailer. He spent 10 hours yesterday washing and then machine polishing the Midas and the job he did was excellent the body now feels like glass.

-
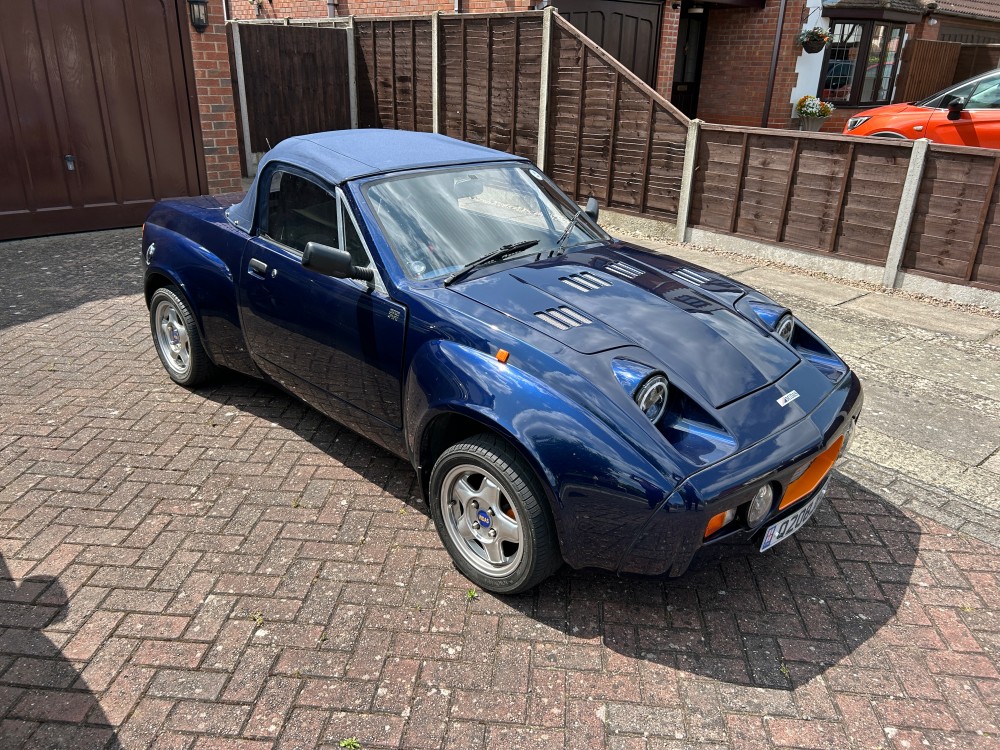
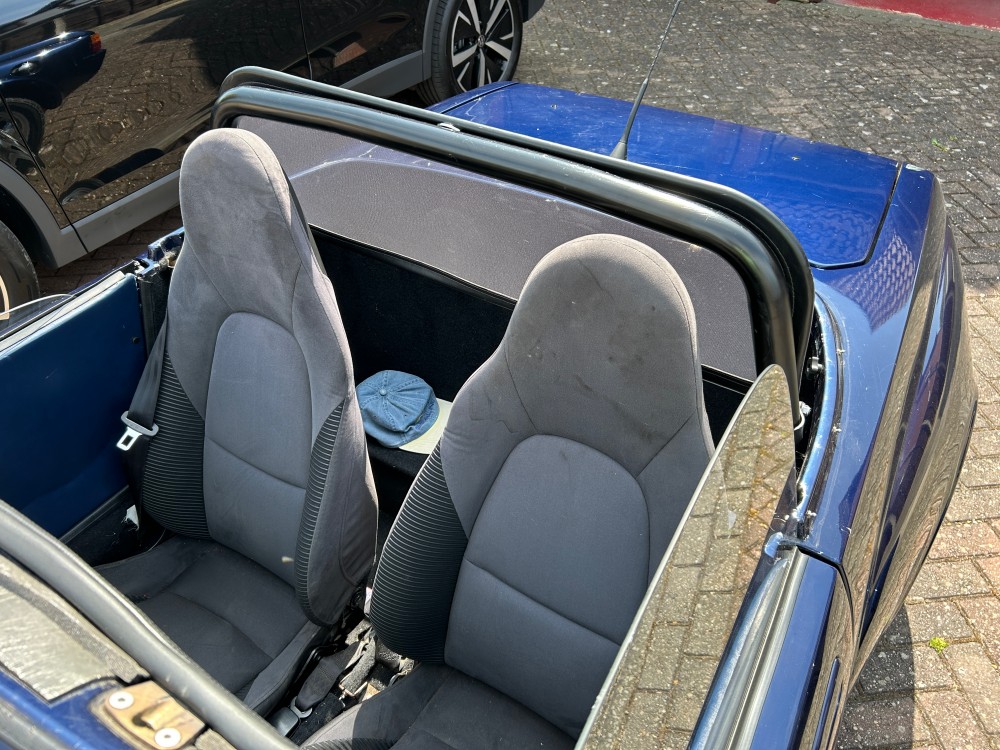
New soft top hood
 The soft top hood that I got when I bought the Midas was in very poor condition and the metal frame that connects to the windscreen was rusty. I took the old hood to Auto Interiors near Newark just off the A1. They removed the pop riveted on metal frame that I then had sandblasted and powder coated. Russell made me a new hood using the old one as a pattern out of blue double duck with beige interior and then fitted it to the car for me. His price was cheaper than the other quotes that I received but he did an excellent job that I am very happy with. We found a couple of issues with the hood frame that I had to fix. The first was one of the clamps for one of the hinges was loose because the bolt had seized and its head had been sheared off so it was not clamping the tube to the frame at all and it was not in the correct place. I drilled the centre of the bolt out and tried an ezy-out to remove it without success so I drilled it out just inside the thread and picked the remainder of the old bolt out with a dental pick. I then tapped the M6 thread to clean it up and fitted a new bolt measured the frame up and positioned the hinge in the correct place and clamped it up. We also found that the webbing between the rear and centre tubes had shrunk as it was cotton based and so the rear tube did not sit on the seam that it should. I therefore replaced the webbing straps with new nylon ones some 20mm longer for the rear bar. I now have a nice taught new waterproof hood on my Midas.
 -
New seats fitted
I finally fitted the MX5 seats in my convertible. I made a template in 12mm mdf with captive nuts in it and bolted the runners I had removed from the seats to it. I made 4 steel plates 90mm square and 8mm thick that I positioned over the old holes and lined up the template seat. I drilled and tapped the plate for 8mm bolts for the runners and the old holes in the floor, that way I didn’t have to put any more holes in the floor. The seats I took out were Mini R5? and didn’t have runners so getting a comfortable driving position wasn’t possible. I turned up some 30mm tall steel spacers under the front runners so that the MX5 seat squab is canted up at the front for thigh support. I can now get a comfortable driving position.
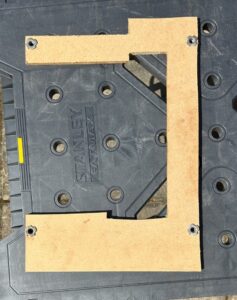 This is the MDF template with the captive M8 nuts in it that I used to position the seat.
 -
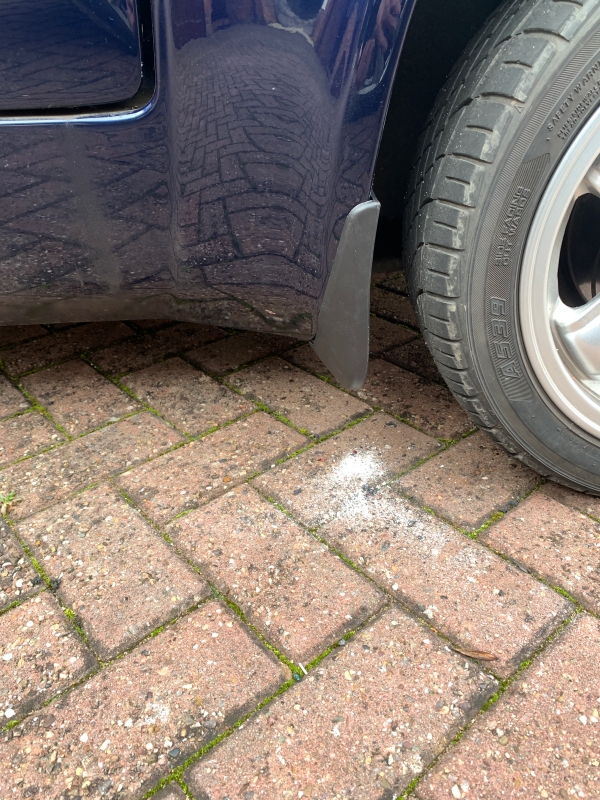
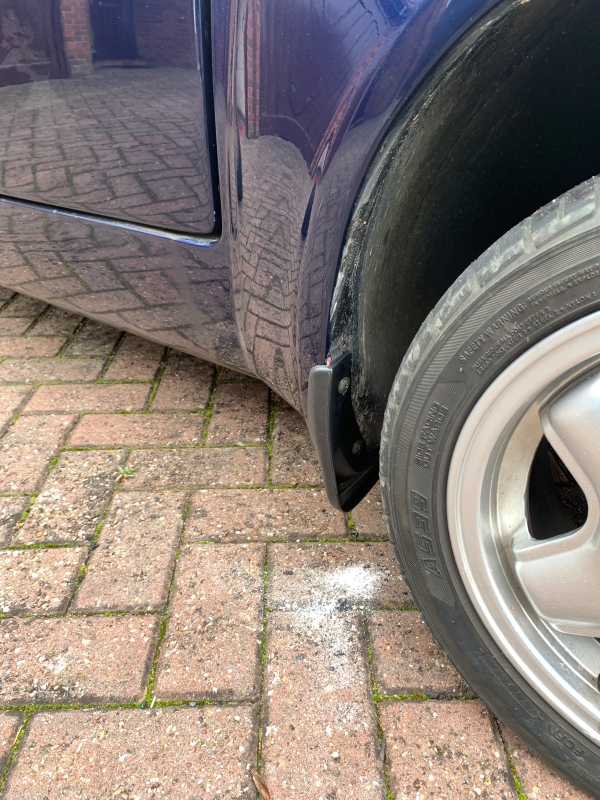
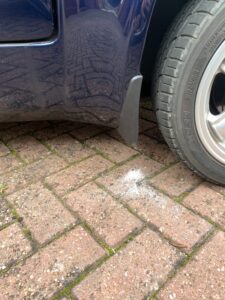
Mudflap+
The Midas was fitted with plastic type of mudflaps to the front. The front offside one split and was hanging down. I removed it and asking on the Facebook page what it came off no one was sure. I posted a photo of the broken one and the Chinese style characters on it. One of the Facebook members showed the photo to a colleague who identified it as come from a Mazda that was sold as a Mazda 6 in the UK. I looked online and on eBay I found photos of a set for sale and it looked identical. I ordered a set and they arrived a week later and unfortunately there were 3 rears and only 1 front. I returned them and a week later I got a replacement set with the 4 correct ones in.
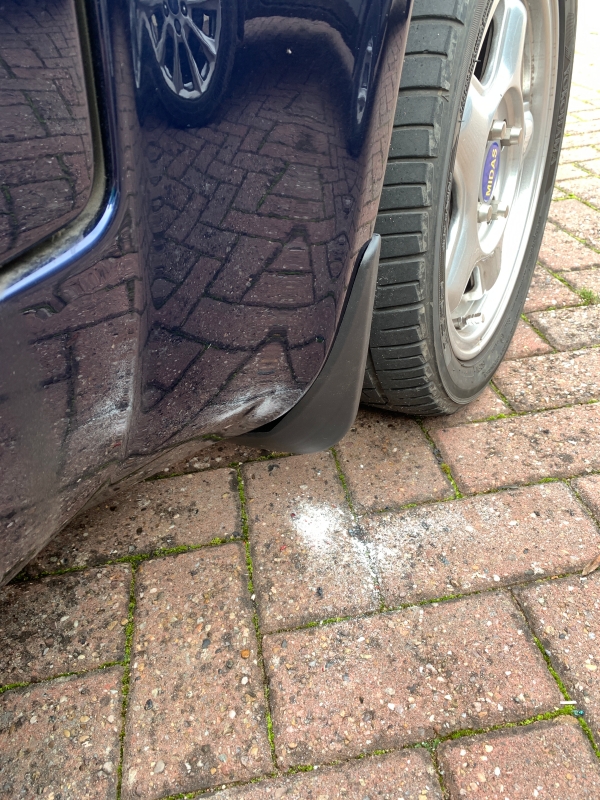
The original one was mounted with 3 screws and a load of black sealer. I scraped off the sealer and went to fit the new one. I found that the new fixing screws were much larger in diameter and so had to drill out the holes in the wheel arch to a larger size. I fitted new new mudflap and it went on well without any sealer. There is a slight gap on the top outer edge and I will try some heat on this to see if I can get it to sit closer to the body. I tried the rear ones on the rear and they are too large and the wrong shape, however, it looks like with a modification the front ones could also fit on the rear. I am not sure that I will bother as it is, of course, front wheel drive.


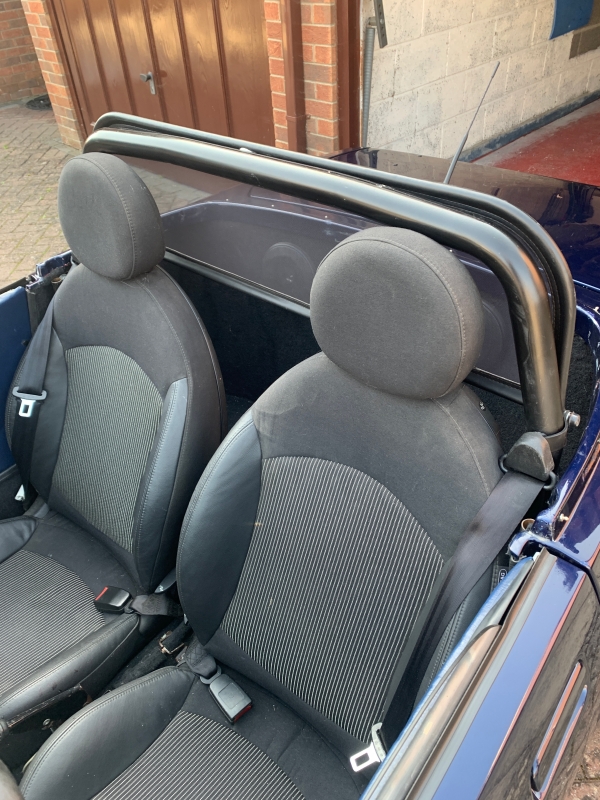
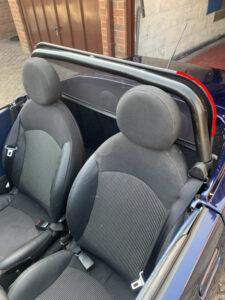
As the cooler weather is now here I decided to fit the hard top back on the Midas and found that it would not seat properly. After some head scratching I found that the issue was with the windblocker that I had fitted It sticks out past the roll hoop on the side at the top and as a result the hard top would not drop down far enough at the rear. As a result I had to remove the windblocker to fit the hard top. The problem area is highlighted in red in the photo below. I will have to see if I can lower the windblocker by making some different brackets so that I can leave it in place with the hard top on.
-
Fan belt +
As it was dry today I wheeled the Midas out of the garage so I could adjust the fan belt after finding it had stretched a little as it bedded in. I removed the bonnet as it is far easier to do anything with it out of the way. With the help of a neighbour to put a bit of tension on the alternator whilst I nipped the bolts up it is now fine.
As I wheeled it out of the garage I noticed something hanging down on the front offside and looked underneath and found it was the front under-tray. When I looked closely it was only held on by 2 self tappers on the nearside with one of those being loose the third one on the nearside and all three on the offside had dropped out. I don’t have any ramps and I can’t currently get at my trolley jack so there was just enough room for me to get one arm and a ratchet stubby screwdriver to put the missing screws back in place. So this will be another winter job to replace the self tappers with rivnuts and bolts to hold it in place.
If the weather is good tomorrow I am going to my local car clubs breakfast meeting near Boston.
-
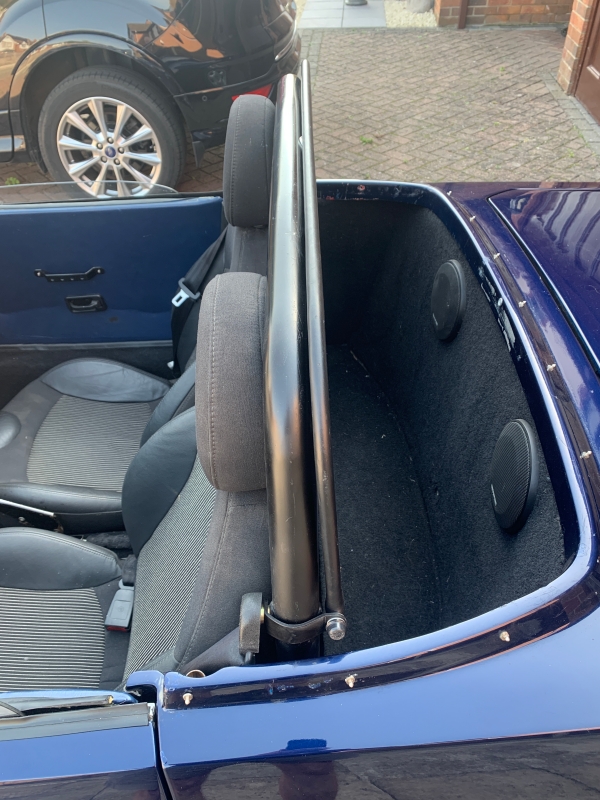
Windblocker fitted
I found that using the Midas with the roof off needed some sort of windblocker to stop the wind swirling around the cockpit.
At the recent Newark show one of the other convertibles there had a home-made windblocker that looked very good so I decided I would have a go at making one myself. I started to get together the bits to make one but then went to a local car event and got chatting to a person there with a Triumph Stag who had bought one from a company in Germany for another car that was the right size that he modified just the brackets to fit. That got me thinking about whether there was a ready-made one that would fit the Midas.
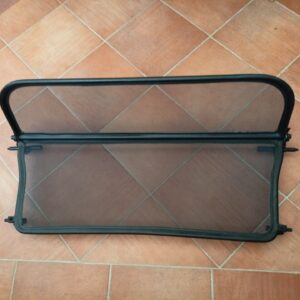
On eBay I found an advert for a second-hand windblocker that was advertised for a ‘Mini R52 R57 Convertible Wind Deflector, 2004-2015’. I found out the size and it was perfect for the Midas, when it arrived I took it apart and removed the horizontal piece as it was too large to suit the Midas. I fabricated a couple of brackets in 3mm aluminium which I mounted behind the upper seat belt mount and bent them to shape. I mounted the wind blocker and have used a rare earth magnet from a failed computer hard disk to keep it attached to the roll bar at the top in the centre. It works really well.
Original from a mini 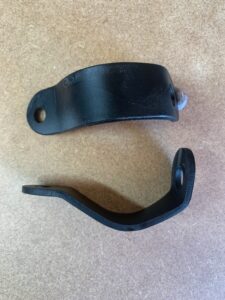
Fabricated brackets 
Brackets and windblocker fitted 
Windblocker in use -
New alternator fitted
I went out one evening to my Woodturning club and with the headlights on I found that the alternator was struggling to put a charge in the battery. The following day I found that the alternator warning light was flickering occasionally during daylight too. So I bought a new alternator from eBay and a new fan belt from a local motor factors and fitted them to the Midas. I had help from a neighbour to tension the fan belt but after running it for a bit we didn’t get it tight enough so still a bit more adjustment needed.
-
Wednesday 9th August
Finished putting the dash back in today along with the radio. I also fitted a GPS digital speedo as the normal speedo is partially obscured by the steering wheel. I just about covers the hole where the battery cut-off switch was, but I will 3D print a cover for the holes and then fit the digital speedo above that. I have 3D printed 3 black knobs that I have fitted with M6 bolts and I have put rivnuts in the shell to retain the rear of the hard top when it is fitted. I hoovered the carpets and the boot to get rid of all the glass fibre dust from my drilling over the last couple of days. I took it for a run to make sure everything was OK and it was. The only problem is that I have misplaced the hazard light switch top and so I need to find a new one from somewhere. Tomorrow I will give it a wash and a polish and if the weather is as forecast I will go to a local custom car meet tomorrow evening.
Now that the dash is easier to get out over the winter I will get the two aluminium panels powder coated black as they currently do create a bit of a reflective distraction.